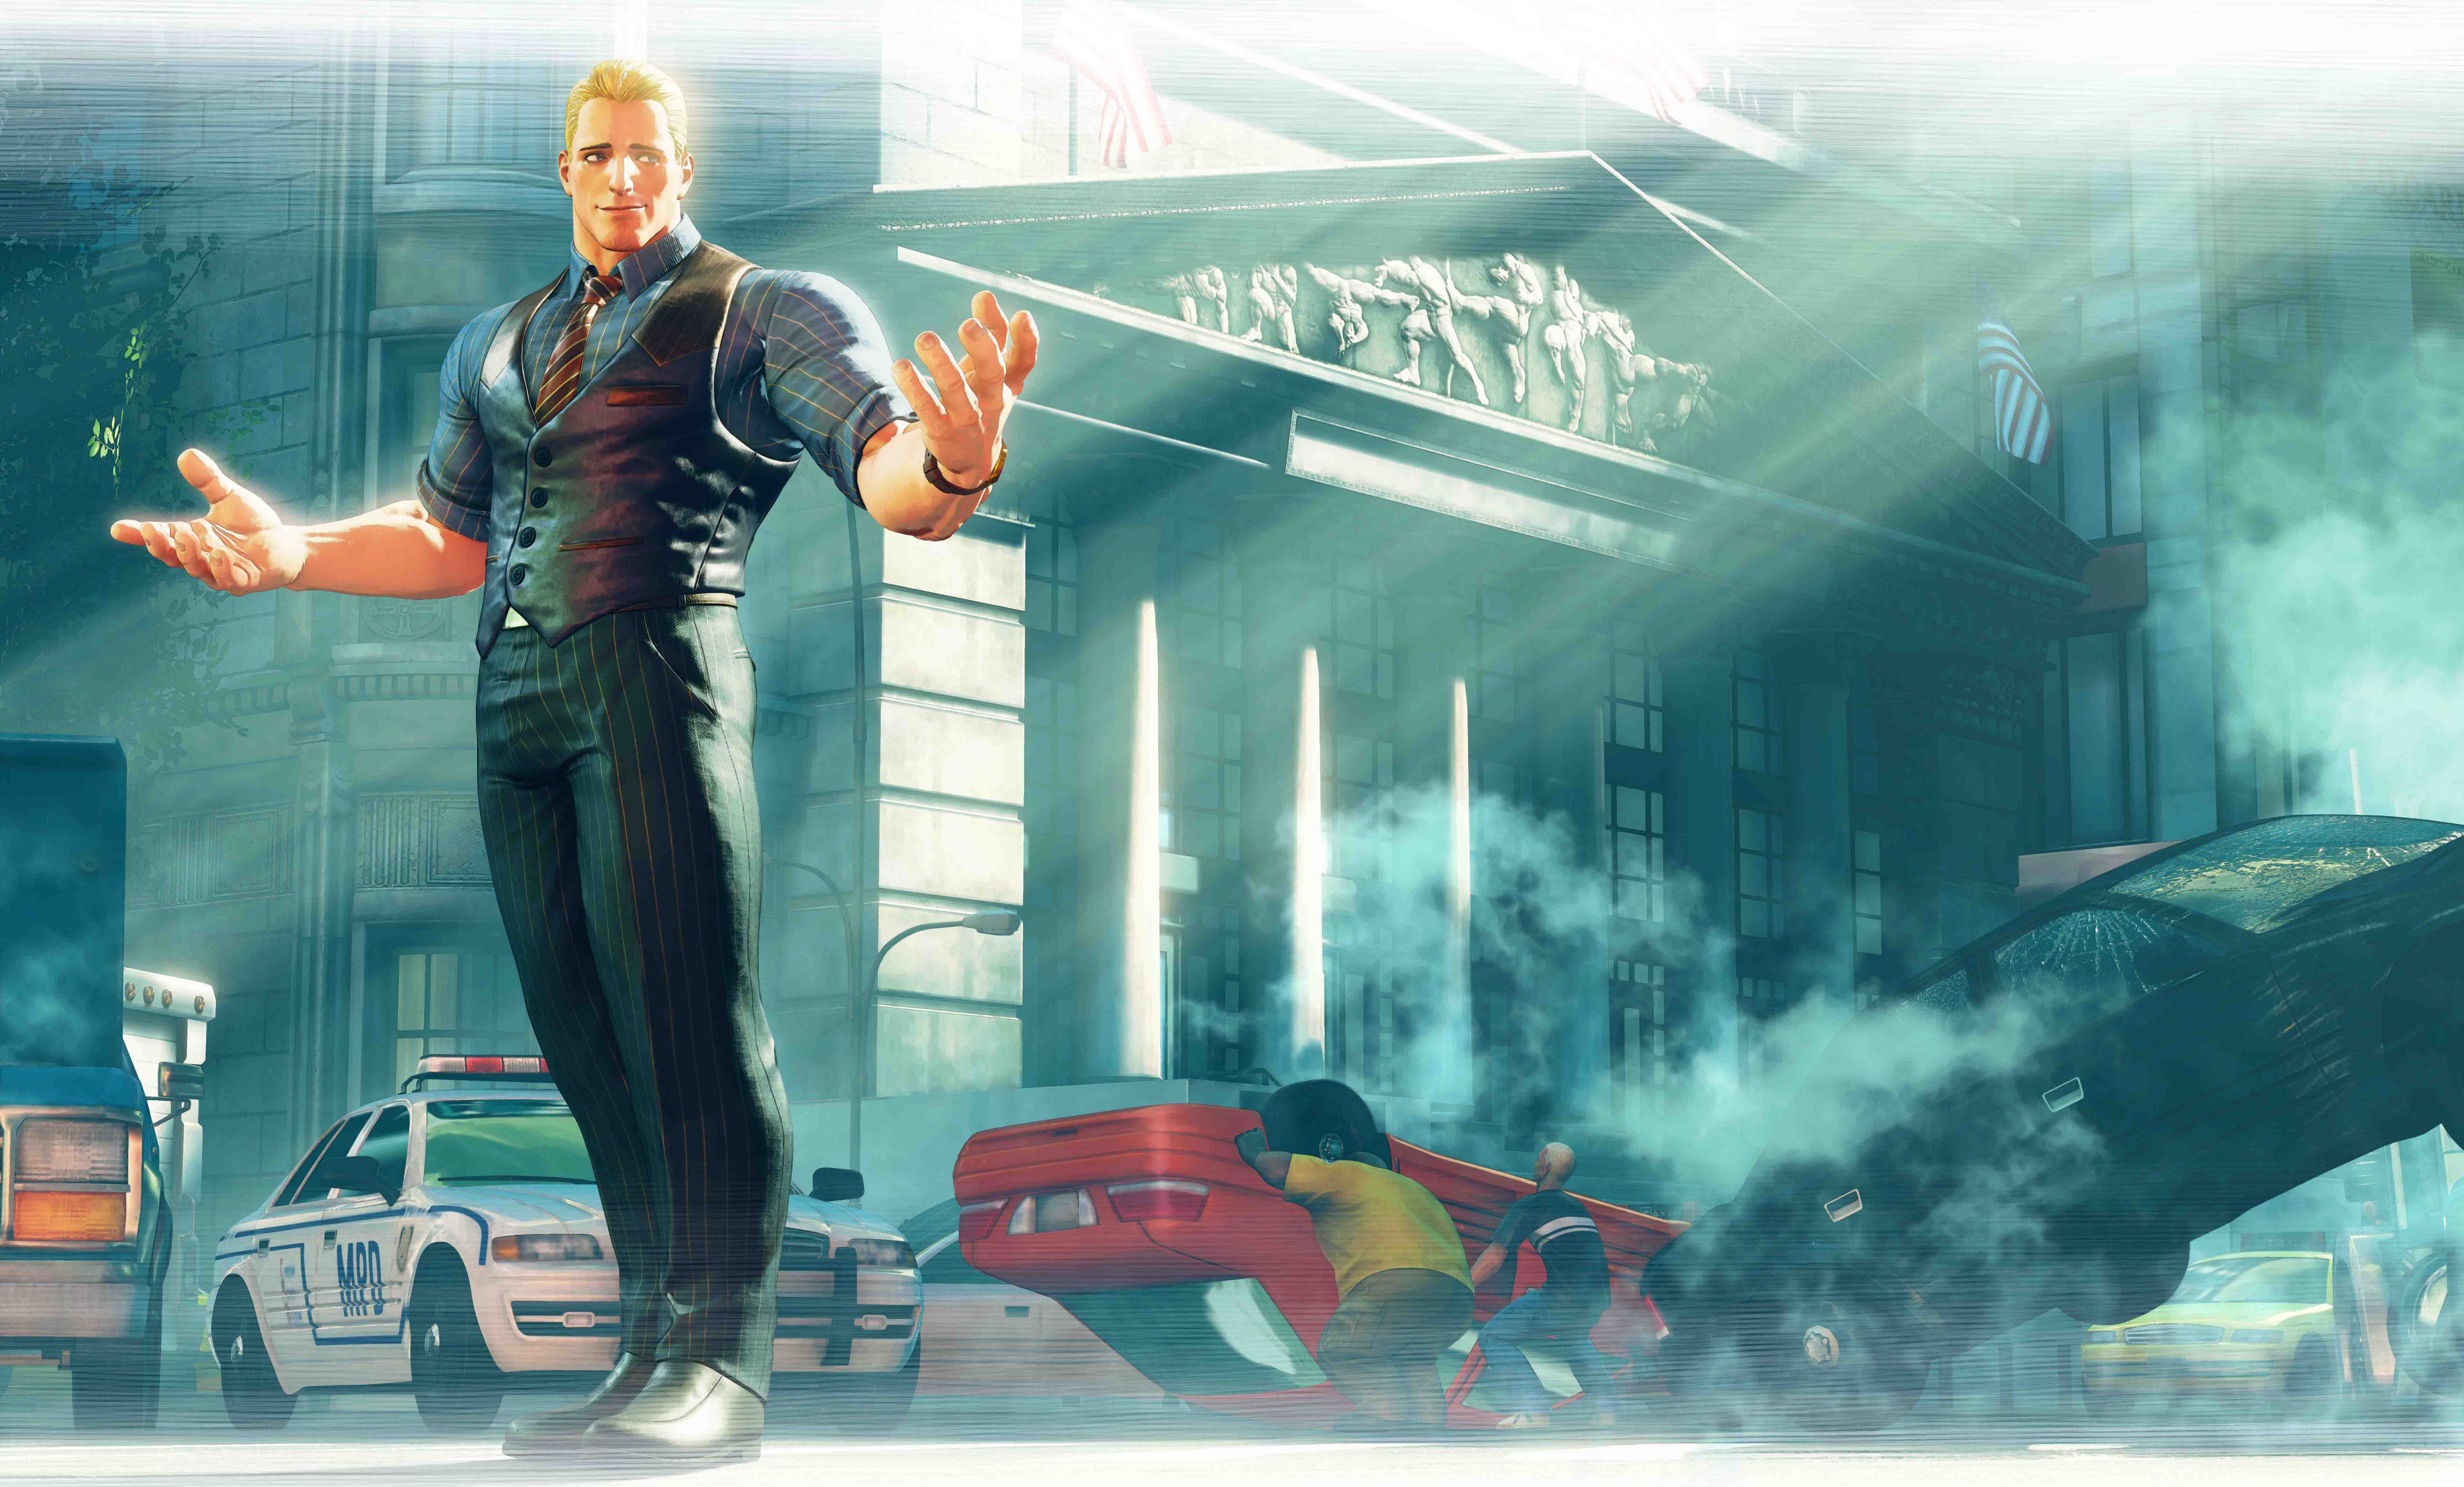
Cody Travers vs Axel Stone (Final Fight/Street Fighter VS Streets of Rage) | Prediction blog


Cody Travers, the criminal turned mayor of metro city
Axel Stone, the isolated brawler from Streets of Rage
In some way or form all of us want to help our community whether it is to feed the homeless, clean up garbage, or literally cleaning up the streets by beating the absolute shit outta the bad guys that give their city a bad rep, these two 90s era Beat 'em Up legends are known for protecting their gang-infected cities from chaos, but when these two icons clash in a fight to the death who's gonna have their final fights on these streets?
Before We Start…
For this blog, since both Cody and Axel come from beat e'm up games this blog will give them both their equipment's and healing items from that game, Cody will be getting Sf scaling as they take place in the same verse along with udon comics and Street Fighter 6 drive mechanics since its a universal thing that everyone has access to it, while Axel will be getting DLC and survival mode weapons, perks and his star moves and with that said let's get on with this blog.
Background
Cody Travers

- Full name: Cody Travers
- Age: Not stated
- Sex: Male
- Height: 6'0" or 6'1"
- Weight: 187 lbs or 176 lbs
- Likes: Starting fights, Metro City street meat, Guy, Mike, Spinach, Milk
- Dislikes: Lectures, boredom, Mad Gear, Corrupt cops, People who are mad at fighting
Cody just wanted to live a normal life with his childhood girlfriend Jessica until that normal life was taken away when Mike called Cody and informed him that the Mad Gear gang kidnaped her, so now teaming up with friend/rival Guy and the Mayor of Metro City, Mike Haggar, to save Jessica. Cody takes on many of Mad Gear's worst thugs, including Damnd, the first Mad Gear Gang member to kidnap Jessica, and Edi. E, a corrupt police officer, In the end, Cody confronted Belger on the top floor of his penthouse, and after a tough battle, Cody was able to use an uppercut to knock Belger through a window, sending Belger plummeting from the top floor to his death on the street below. Cody is then celebrated as the hero of Metro City and Jessica herself wants to celebrate with Cody, but Cody tells Jessica that he can't sit still while evil continues to stalk the streets. After sharing a passionate kiss with Jessica, Cody leaves the city for parts unknown.
After a year he returned to Metro City, where he learned that the Mad Gear gang is beginning to reform, and that his girlfriend Jessica has gone missing after a series of riots that occurred in the city following the destruction of Mad Gear. Hoping to prove himself that he is Jessica's hero, Cody tried once more to come to her rescue, battling many thugs along the way. Sadly, Cody wouldn't get the chance to continue his search for Jessica, as he was arrested by Edi. E for crimes that were committed by Mad Gear member Poison and the many street fights that Cody had participated in from his time. Jessica's whereabouts in the game are never resolved in any of the playable characters' endings. However, the design sketches for Cody from Street Fighter Zero 3, as well as the Street Fighter Zero 3 Secret File Book would establish that Haggar was able to rescue Jessica, and that she and Cody had ended their relationship on a bitter note, due to Cody being jailed for his reckless street fighting and that Jessica had decided to take a trip to study abroad in Europe. Even after his arrest, Cody still continued his training and casually breaks out.
Mike Haggar exonerates Cody of his crimes, which leads to him being the new mayor of Metro City. Now no longer a prisoner, he finds the job tedious and boring, but he secretly finds an opportunity in his new position as mayor to finally clean Metro City of its criminal activities in person (both physically and while at his desk), just like how his immediate predecessor and himself did way back.
Axel Stone

- Full Name: Axel Stone
- Age: 33+ as of SOR4
- Sex: Male
- Height: 6'0"
- Weight: 165 lbs
- Likes: Video Games, Blaze, Adam, Max
- Dislikes: Corrupt Cops, gangs
Axel joined the Wood Oak City Police force before the events of Streets of Rage. Over time the Syndicate managed to successfully take over the city with the police on their payroll allowing crime to run rampant. He and his partners Blaze Fielding and Adam Hunter decided to hand in their badges to clear up the city streets as vigilantes, and put a stop to Mr. X and his lieutenants. After visiting every area of the city and even managing to defeat Mr. X himself, they successfully seemed to liberate Wood Oak City of the Syndicate and believed peace was restored. Axel proceeds to move outside of Wood Oak City and finds work as a professional bodyguard.
On the one-year anniversary of Mr. X's defeat, Axel was supposed to reunite with Blaze and Adam to celebrate their successes and reminisce about old times, when he received a phone call from Adam's younger brother Eddie "Skate" Hunter who reveals that the home he and Adam live at had been ransacked and Adam was missing. Axel and Blaze both come to investigate their missing friend, and discover a photo of Adam bound by chains with Mr. X standing over him. Axel calls in a favor from his professional wrestler friend Max Thunder to aid him, Blaze, and Skate in taking down Mr. X and his new order syndicate and rescuing Adam. After a hard-fought battle, Axel, Blaze, Skate, and Max manage to defeat Mr. X once more, and rescue Adam.
The Streets Of Rage 3 story differs depending on which version you play so for this one I will be including both versions and then a version that matches both together
Jp version: Axel decides to rejoin the police force, alongside Adam and Blaze, a terrifying experimental weapon goes off, which kills thousands of innocent civilians, and injures even more. Axel and Blaze are assigned to investigate and bring the people behind this attack to justice. At the same time, Axel himself is framed for the kidnapping of General Ivan Petrov, a representative of the Lima region who had been invited to the White House for peace talks. Whilst trying to work out what happened and how to prove Axel's innocence, Axel and Blaze are contacted by the man who claims to be behind the creation of the weapon that killed thousands of civilians, Dr. Zan. He informs them that his research is being used by powers who plan to use Wood Oak City as a testing ground for its terrifying destructive purposes.
Western version: Blaze contacts Axel to help in her private detective investigation after receiving a tip-off from Dr. Zan that he's come across plans for Mr. X and the Syndicate to take the city over once more and replace the chief of police.
Both: Axel decides to team up once again with Blaze, Skate, and Dr. Zan, a former syndicate member who lost his body due to the Syndicate's attacks and wishes to make amends by revealing the bomb locations. He eventually comes across 'Break', a robotic replica of Axel, that was used to frame him in the kidnapping. Axel and the others defeat Break, and proceed to fight against Mr. X's own robotic replica, Robo-X, Mr. X's right-hand man Shiva, and the mad scientist Dr. Dahm before coming face to face with Mr. X for a third time. Having barely survived the past two encounters, Mr. X is merely a brain in a jar at this point and fights against Axel and the others using a robotic mech known as Neo. X. Axel manages to defeat Neo X within three minutes whilst Adam defuses the bombs and the heroes go their separate ways knowing after this third and final defeat Mr. X can no longer terrorize the city.
Ten years pass, and Axel Stone has once again left the police force, instead living a life in isolation where he continuously trains and studies martial arts. Blaze gets in contact and reveals that after some investigation the Syndicate is back on the rise and she needs Axel's help once again to clean up Wood Oak City, to which he immediately returns to lend his aid. Mr. X's offspring are now following in his footsteps and it's up to Axel, Blaze, Adam, Adam's daughter Cherry Hunter, and Dr. Zan's apprentice Floyd Iraia to put a stop to the revival of the Syndicate.
Experience/Skill
Cody Travers
Cody has been training since he was 9 and is used to fighting throughout the years as all of us know he fought against the likes of the Mad-Gear gang multiple times and has thrown down with the cast of Street Fighter multiple times as well, his time in person has changed the way he goes about fighting as he now fights more dirty and uses any weapons that he find on the ground even as the mayor of Metro City Cody still goes around and fights people who he thinks can put up a good fight against him still using the same dirty tricks that he did when he was in jail.
Axel Stone

Equipment
Cody Travers
Pick up weapons

- Knife: A hand knife best used by Cody. While Guy and Haggar can only use it as a throwing weapon, Cody's knife expertise allows him to repeatedly stab enemies at melee range whenever the knife flashes red.
- Steel Pipe: An iron pipe, best used by Haggar. As a professional wrestler, Haggar can exploit his brute strength to bludgeon his opponents with such a heavy weapon in a faster rate and more crushing damage from a longer distance, but Cody and Guy will slow down while holding it due to its weight.
- Katana: A sharp blade that has the power of the Knife and the reach of the Pipe. It is a well-balanced weapon good for all characters, especially Guy as he can use it faster.
- Nightstick: A powerful tonfa that acts like the Katana from the previous game, but with a shorter range. It is handled better by Maki.
- 2X4: A piece of lumber with long range. It acts like the Pipe from the previous game, being better for Haggar.
- Nunchaku: Balanced range and power. Better handled by Guy.
- Club: An expandable baton with low reach and power, but fast to use. More suited for Lucia.
- Hammer: A heavy hammer that is thrown at enemies. When used by Dean, he will charge the hammer with electricity before throwing it, causing more damage.
- Army Knife: A short-range blade that works like the knife
- Bazooka: A large weapon that can be fired eight times and explodes on the target.
- Bomb: A grenade that can be thrown at the opponent.
- Chainsaw: Used to slash and rend opponents.
- Flame Thrower: A flame thrower that releases flames to burn enemies
- Freeze Gun: A gun that can temporarily freeze the target.
- Gun: A standard handgun with eight bullets.
- Jack Knife: A stronger version of the knife
- Katana: Except for Guy, who uses the Japanese blade to thrust at his opponent, all characters use it to slash opponents.
- Machine Gun: Rapid fire weapon with 48 bullets.
- Musashi's Sword: A stronger Katana.
- Nyoi-bo: Similar to Rolento's stick, but with a longer range due to its size.
- Poison Claw: Slightly increases the reach of punches. When used by Poison, it increases her strength.
- Police Stick: A small bludgeoning weapon.
- Rifle: A slow but strong weapon with 16 bullets.
- Shotgun: A strong weapon with a wide range. Has 10 shells.
- Spiked Knuckles: Increases the damage of punches.
- Stick: A medium bludgeoning weapon. Rolento starts each round with one.
- Stun Gun: A gun that temporarily stuns the target. Has 10 shots.
- Survival Knife: Same as the other knives, but Cody gains a double swipe attack when using it.
- War Hammer: A large and powerful bludgeoning weapon that can easily stun the opponent.

- Barbecue: Restores 100 to 128%
- Steak: Restores 50 to 128%
- Chicken: Restores 50 to 128%
- Hamburger: Restores 64%
- Hot Dog: Restores 25 to 64%
- Pizza: Restores 64%
- Curry: Restores 50 to 64%
- Sushi: Restores 64%
- Banana: Restores 32%
- Pineapple: Restores 32%
- Apple: Restores 32%
- Orange: Restores 32%
- Grapes: Restores 32%
- Soft Drink: Restores 11 to 16%
- Cola: Restores 16%
- Soda: Restores 16%
- Beer: Restores 16%
- Root Beer: Restores 16%
- Milk: Restores 11 to 16%
- Whisky: Restores 16%
- Vitamine: Restores 16%
- Vitamins: Restores 16%
- Vitamin Drink: Restores 16%
- Gum: Restores 16%
- Edi.E Gum: Restores 64%
- Tempura: Restores 50%
- Meat Bun: Restores 50%
- Lobster: Restores 50%
- Loaf of Bread: Restores 25%
- Donut: Restores Restores 25%
- Spinach: Restores 25%
- Coffee: Restores 11%
- Chocolate Bar: Restores 11%
- Bun: Restores 50%
- Fries: Restores 25%
- Sandwich: Restores 25%
- Candy: Restores 11%


A rare item that gives the player an extra life. In Final Fight Guy and Final Fight One it has the shape of a doll from the player's character. In Fight Fight 2 its name and appearance is of a Guy doll. In Final Fight 3, the 1UP has the appearance of Mobi-chan. Mighty Final Fight contains two versions, a 1UP shaped like a heart and a 2UP shaped like Mobi-chan.


Pick up weapons

- Beer Bottle: A beer bottle that the player can use to knock enemies down
- Knife: A knife used to stab enemies or be thrown at them
- Baseball Bat: A baseball bat used to knock down multiple enemies
- Lead Pipe: Works like the baseball bat as it's used to knock down multiple enemies but it has longer range
- Paper Shark: A shark made out of paper somehow it's used to stun enemies
- Kunai: A sharp kunai that's meant to throw at your target
- Katana: A weapon that use to slash your enemies
- Grenade: Detonates upon impact or after a while, its explosion can hit multiple enemies and the player
- Plank: A plank the player swings above and to the front; knocks enemies in front of the player
- Sword: Works like the Katana as it's used to slash the enemy
- Nail Bat: While it doesn't launch opponents as far as the baseball bat it deals a bit more damage and has higher durability.
- Tonfa: A police nightstick, which, when swung, flinches opponents instead of knocking them back, allowing for stunlocking enemies. Tonfas are often carried by Murphy and found in stages where there are police officers.
- Golf Club: Functions similarly to the baseball bat, launching opponents upwards high in the air, but not as far.
- Pool Cue: Much like the bottle, the pool cue is unique as it technically counts as two weapons, when intact, it's swung like a blunt weapon, becoming the the broken pool cue when hitting an opponent once, and then functions like the knife.
- Road Sign: A road sign that deals high knockback.
- Butcher's Knife: The butcher's knife, despite its appearance, is best used when thrown, as it deals over double the normal swing damage, on top of piercing and damaging multiple enemies
- Eel: Deals electric damage, shocking enemies near the impact. When thrown, it pierces all enemies in its path. Unlike other weapons, the eel cannot be caught in mid-air with the grab button.
- Halberd: A chinese guandao. Has long range and can pierce through enemies blocking.
- Broom: A floor squeegee. Similarly to the tonfa, swinging it flinches opponents instead of knocking them out; however, each swing pushes enemies a bit
- Hammer: A hammer that deals very low knockback when swung, but high when thrown
- Mace: A large construction mallet. Has high range and ground-bounces opponents into the air.
- Morning Star: Similarly to the baseball bat, it launches enemies very far upwards, but deals more damage.
- Durian: Can ground bounce enemies when swung; doesn't travel very far when thrown.
- Axe: A DLC weapon that deals medium knockback.
- Chinese Saber: A DLC weapon that functions similarly to the katana, but has higher durability.
- Chinese Sword: A DLC weapon that when swung, it deals low knockback and launches opponents slightly upwards, allowing for consistent juggling, especially when near a wall. When thrown, it launches opponents very high in the air.
- Black Sword: A DLC weapon that launches opponents extremely far and high in the air. Has the highest range of all melee weapons in the entire game.
- Fire Sword: A DLC weapon that deals fire damage, igniting enemies and causing them to leave a burning area when they fall to the ground.
- Poison Sword: A DLC weapon that deals poison damage, causing enemies to take damage over time.
- Thunder Sword: A DLC weapon that deals thunder damage, shocking enemies near to the impact.
- Pugil Stick: A DLC weapon similar to the tonfa, it only flinches opponents when swung, but causes them to slide far away.
- Hockey Stick: A DLC weapon that functions exactly like the golf club, launching opponents upwards high in the air, but deals significant more damage and has more range.
- Energy Saber: A DLC weapon that functions exactly like the tonfa, flinching opponents instead of knocking them back, allowing for stunlocking enemies. In addition, when thrown, it functions like the boomerang, but covers much more distance.
- Tuna: A DLC weapon that's similar to the swordfish, it deals massive knockback when used, launching opponents very fast and far until they hit a wall. The tuna inflicts a larger wall bounce than the sword fish.
- Taser: Electrifies enemies, dealing high damage and stunning them for few seconds.
- Umbrella: Functions similarly to the tonfa, flinching opponents instead of knocking them back, although the umbrella pushes them slightly. It deals two hits when swinging if connecting with the earlier and closer hitbox.
- Sai: Functions similarly to the knife, but doesn't break instantly when thrown.
- Trident: The trident is a DLC weapon, it's a unique and notable weapon. At close range, the first hit it connects with an enemy will pull it towards the player, and a second strike will launch it away; and it the enemy hits a wall, it'll ground bounce. If thrown, the trident will pierce and hit all enemies in its trajectory.
- Fugu: A poisonous pufferfish, it functions similarly to the umbrella, flinching opponents while pushing them slightly. It poisons enemies on contact, and doesn't travel far when thrown, but flies in a large arc. It deals two hits when swinging if connecting with the earlier and closer hitbox.
- Combat Knife: A DLC weapon that functions similarly to the knife, but doesn't break instantly when thrown and has higher durability overall.
- Electric Vial: Creates a shocking area on the ground that stuns enemies. Also affects player characters.
- Explosive Vial: Creates a patch of fire on the ground that deals high knockback to enemies. Also affects player characters.
- Acid Vial: Slowly depletes health and also slow down enemies on it. Also affect player characters. Lost health from acid damage can be recovered by dealing damage as long the player doesn't take any direct damage. Players won't die from the poison, but enemies will.
- Pool Ball: Very scarce weapon, being found near the end of Stage 5, aside from a rare drop from barrels and crates.
- Boomerang: When thrown, it returns back towards the user. Can hit multiple opponents, but only once in per thrown cycle.
- Brick: Very scarce weapon, aside from a rare drop from barrels and crates on Survival Mode.
- Shuriken: Flinches opponents instead of knocking them down, the player can either parry his thrown or pick up his missed attacks.
- Bowling Ball: The bowling ball is a DLC weapon, when throw, it rolls on the ground and will hit any enemy, only breaking upon hitting a wall. Unlike other weapons, the ball will break regardless of hitting opponents or not.
- Land Mine: The land mind is a DLC weapon. When thrown, it'll arm and flash green. Enemies who walk over it will trigger its detonation, dealing massive damage. Players can pick up the armed land mine to arm it again.
- Stun Grenade: The stun grenade is a DLC weapon. When thrown, it'll arm and flash green. Enemies who walk over it will trigger its detonation, dealing massive damage. Players can pick up the armed land mine to arm it again.
- Chili: Chili is a DLC weapon. A red chili pepper which deals fire damage, igniting enemies and causing them to leave a burning patch on the ground where they fall. It's thrown trajectory is similar to a grenade, but travels faster and farther.
- Golden Knife: Functions exactly like the regular knife, but boasts far more power and durability. Can only be obtained in Survival Mode by getting as an upgrade between waves. It also has a very low, random chance of spawning from vases in temple stages.
- Golden Pipe: Functions exactly like the lead pipe, but boasts far more power and durability. Can only be obtained in Survival Mode by getting as an upgrade between waves.
- Golden Boomerang: Functions exactly like the regular boomerang, but boasts far more power and durability. Can only be obtained in Survival Mode by getting as an upgrade between waves. It also has a very low, random chance of spawning from vases in temple stages.
- Golden Halberd: Functions exactly like the regular halberd, but boasts far more power and durability. Can only be obtained in Survival Mode by getting as an upgrade between waves.
- Golden Chicken: Deals the most damage out of any weapon in the game. Can only be found at the start of Stage 8. If the player takes the Golden Chicken to the boss room at the end of the stage, they receive an achievement.

- Apple: Restores small HP (30%)
- Can be changed into: Onigiri, Croissant, Onion Rings, Pizza Slice, Tofu, Caviar, Sliced Pineapple, Breakfast Plate, Spring Rolls.
- Beef: Fully restores HP (100%)
- Chicken: Fully restores HP (100%)
- Can be changed into: Bowl of Ramen, Ham, Poutine, Cheeseburger, Salad, Lobster, Fruit Basket, Durian, Fried Chicken, Stir Fry, Birthday Cake.


- Burst Shot: Cody delivers a lunge to his opponent's stomach. If the first hit connects, he delivers an upward thrust to the neck region. This is Cody's only target combo that's exclusive to his first V-Trigger. Like most target combos, it is very unsafe on block. However, Cody can cancel the second hit of Burst Shot into his special attacks or Critical Art. If Cody's V-Gauge is depleted, then he cannot perform this target combo since the first attack causes him to drop the knife.
- Snipe Shot: Cody throws his knife straight at his opponent, similar to his Knife Throw. Because he cannot perform Tornado Sweep while he has the knife, Snipe Shot becomes Cody's long-range attack. Not only it has a faster startup than Tornado Sweep, but it also inflicts slightly more damage. It also travels fast across the full length of the screen. However, the knife has a hurtbox, similar to Ibuki's Kunai. If timed properly, his opponent can hit Cody's projectile in the air without taking any damage. Additionally, this moves has better frame advantage than Tornado Sweep. It is +3 on block. At point-blank range, he can maintain pressure with normals or break through their defenses with throws. Hitting the opponent with Snipe Shot puts the opponent in a juggle state, allowing Cody to continue the combo with Hammer Kick or Ruffian Kick. While using this move causes him to lose the weapon, Cody can cancel into Reload to quickly equip himself with another knife.
- Anti-Air Snipe Shot: Cody throws the knife upward at a 45° angle. As the name suggests, this is an anti-air attack. Because of the range and angle, Cody can interrupt his opponent's jump-in attempts from afar. It also puts them in a juggle state on hit, allowing him to follow up with another attack. While he is holding the knife, Cody cannot perform Tornado Sweep. In addition, using Anti-Air Snipe Shot causes him to lose his weapon. By cancelling it into Reload, Cody can equip himself with another knife. This move comes out slightly faster than the ground Snipe Shot. It also inflicts similar damage and stun. However, Anti-Air Snipe Shot is +0 on block. At point-blank range, his opponent can challenge or potentially trade with a 3-frame normal.
- Reload: Cody reaches behind his back and pulls out another knife. This gives him an additional opportunity to utilize the exclusive attacks and buffs that come while using the knife. While performing this move costs about 1/3 of V-Meter, it is important to get as much rewards as possible that comes with this V-Trigger.
- Rapid Fire: Cody transitions to a reverse grip with his knife and delivers a forehand slash across his opponent's body. If the first attack hits, he follows up with six additional, rapid slashes to his opponent with the final hit resulting in a knockdown. This move is +3 on block. It is Cody's most damaging attack with the knife that can be cancelled into his Critical Art. By ending combos with Rapid Fire, Cody can inflict optimal damage at the cost of almost half of his V-Gauge.

- Secret Work: Cody first grabs his opponent by the head and delivers a knee strike to the midsection. He then shoves his opponent backwards with his shoulder. As his stumbling opponent recovers, Cody swings the pipe down on top of their head, causing them to fall face-first to the ground. He then follows up by bashing his opponent three times on the ground. If no directional input or button is pressed, Cody looks in both directions and shrugs before dropping back to his stance. While a few characters in Street Fighter V have a third grounded throw, Cody is the only one that has a throw that's exclusive to his second V-Trigger. It inflicts the same damage as his forward throw, while dealing the same stun as his back throw. Unlike most of Cody's V-Trigger attacks, this one does not consume any V-Gauge when performed.
- Gentle Swing: Cody swings his pipe, similar to swinging a baseball bat. This move is one of Cody's most versatile attacks that's exclusive to his second V-Trigger. It is -2 on block, making it difficult for his opponent to punish. Gentle Swing inflicts good damage. This move is mainly used to end combos. It can be cancelled from all of Cody's normals and special moves, including his Critical Art. Not only Gentle Swing results in a knockdown, but Cody can also cancel into Bean Ball to immediately put pressure on his opponent's wake-up. The descending rock keeps them on their heels, giving Cody excellent frame advantage and an opportunity to break through his opponent's defenses with throws or his command grab. This attack is also effective against zoning characters. Gentle Swing can reflect fireballs, including EX projectiles and Critical Arts. However, using this move costs about 1/3 of his V-Gauge. Cody can also not perform Tornado Sweep while he's holding the pipe. Additionally, Gentle Swing cannot be performed if his entire V-Meter is completely depleted.
- Gentle Upper Swing: Cody swings his pipe upward at a 45° angle. This attack is one of Cody's anti-air attacks exclusive to his second V-Trigger. While it inflicts the same damage and stun as the ground Gentle Swing, the range makes it an excellent anti-air tool. This attack is mainly used to extend combos. On hit, it puts the opponent in a juggle state, allowing Cody to follow up with another Gentle Swing. This attack shares many similarities to the ground Gentle Swing. Besides reflecting all kinds of projectiles, it can be cancelled from all of Cody's normals and special attacks. It also results in a knockdown. Cody can then immediately cancel Gentle Upper Swing into Bean Ball to maintain pressure on their wake-up. However, this move is -6 on block, making it easier for his opponent to punish. He also cannot perform Gentle Upper Swing if his entire V-Gauge is completely consumed.
- Bean Ball: Cody pulls out a rock and tosses it up. This is Cody's tool against his opponent's wake-up. If they quick or back rise, it can be hard for them to counter since they must respect the descending rock. Cody can cancel this move from his normals and special attacks. However, it is mainly used to set up his projectiles. The strength of the button pressed determines the distance of the toss, although the difference is minuet. Tossing the rock does not consume V-Gauge. This allows him to toss as many rocks as desired to keep his opponent on their heels and at a distance. Once again, Cody cannot toss any more rocks if his whole V-Gauge is depleted.
- Present Delivery: After tossing the rock, Cody swings his pipe to hit the rock, similar to hitting a baseball with a bat. Because he cannot perform Tornado Sweep while holding the pipe, Present Delivery becomes Cody's primary zoning tool. Unlike other fireballs, this attack requires precise timing that determines the projectile's flight path, damage, and properties. If Heavy Punch and Heavy Kick are pressed too early, the rock flies at an arch toward his opponent at a decent speed. Pressing too late results in Cody hitting the rock to the ground, causing it to bounce toward his opponent. Hitting the rock with perfect timing results in the projectile flying straight toward the opponent. Not only it travels faster across the screen, but it also hits the opponent three times, inflicting more damage. Additionally, a perfectly timed Present Delivering cannot be reflected back.
- Unluck Gift: After tossing the rock, Cody swings his pipe upward to hit the rock toward the sky. After a while, the rock drops down and bounces twice before disappearing. Unlike Present Delivery, the timing for this move is more generous. It is mainly used to set up or extend flashy combos or to surprise the opponent with a descending, yet unseen projectile. The strength of the punch button pressed determines where the rock descends. The Light version lands about 1/4 of the screen. The Medium version lands about halfscreen. The Heavy version lands about 3/4 of the screen. While Bean Ball can maintain pressure on his opponent's quick rise, Unluck Gift can be used if they delay their wake-up. As the rock comes down, Cody can keep his opponent on their heels with his normals, throws, or command grab. He can also jump to the other side as the rock is about to hit the opponent, giving him a deceptive mix-up.
- Toss & Smash: Cody grabs his pipe with both hands, winds up, and delivers a massive swing that sends his opponent flying across the stage and bouncing off of the wall. Like Present Delivery, this move requires precise timing to get the most damage and stun. If Heavy Punch and Heavy Kick are pressed too early or too late, Cody's swing sends them spinning across the stage. While it results in a knockdown and decent damage, a mistimed Toss & Smash resets the neutral game. Not only a perfectly timed command grab inflicts massive damage and stun, but it sends his opponent bouncing off of the wall and landing right at Cody's feet. This allows him to continue pressure by performing Bean Ball. Because this move is a command grab, it cannot be blocked.
- Garbage Chute: Cody throws the pipe at his opponent. This can be used as a projectile option. Instead of tossing a rock that may leave Cody vulnerable, he can instead throw the pipe at the opponent to keep them at a distance or catch them off-guard. It only travels 3/4 of the screen.


- Overdrive: This allows the user to pretty much preform an ex version of their attack dealing more damage and giving it more range, you know you used it when you glow yellow
- Drive Parry: Parrying your opponent refills your drive bar but it uses your bar overtime, you can also preform a perfect parry that slows down time and zooms in the camara and allows you to follow up but the drawback is that it reduces your damage
- Drive Impact: This is similar to that of the focus attack, which allows the person to preform and attack with super armor with it that lets you tank 3 hits
- Drive reversal: A drive reversal that lets you knock back the enemy to get them off you
- Drive Rush: You rush into your enemy at a speed higher than normal, it lets you cancel an attack and chain it with another


- Jab: Axel throws two jabs, one straight, a middle kick and finishes with a strong high kick.
- Charged Attack: Axel can perform the last hit of his jab combo at any time, as its own attack. Axel's charged attack is special in that its momentum can be harnessed to perform a sliding version of his special attacks.
- Grapple: Axel grabs the enemy and holds them close. All throws can be used to stun other nearby enemies.
- Flurry/Fury: Axel delivers a string of high knee bows, eventually letting the enemy fly away with one final knee strike or headbutt.
- Grab Neutral Attack: Axel headbutts the enemy, sending them flying forward.
- Grab Back Attack: Axel rapidly bends backwards enough to touch the ground with his back, throwing the enemy with all his momentum. Good for hitting other enemies.
- Vault: Axel flips above the enemy while still holding them, ending up behind them. He can also leap upwards and away from the enemy mid-vault with a vault jump.
- Backdrop: A throw that can only be executed from behind. Axel body slams the enemy behind him while jumping forward (SoR2), or performs a suplex.
- Back Attack: A quick backhand punch thrown at anything behind Axel.
- Air Attacks: While his air jump and attacks may not be as good as the others Axel can still perform said attacks
- Neutral Jump Attack: Axel performs a high snap kick that can send enemies flying.
- Forward Jump Attack: Axel throws a long-lasting forward kick.
- Down Jump Attack: Axel lands on an enemy with both knees.
- Combo Jump Attack: Axel throws out a straight kick right after a downwards jump attack (SoR4).


- White perks - These perks can be picked multiple times and upgraded, with stackable effects, with a cap (usually up to four or five times). Additional stacks usually have diminishing returns, granting smaller bonuses.
- A little closer to the stars: Increases the score bonus by +40%. Subsequent upgrades increase to +70%, +90%, +100% and +105%.
- Aim Master: User gains one extra jump, up to five jumps.
- Damage up: Increases damage dealt by +10%, up to +40%.
- Defense up: Decreases damage taken by -10% up to -25%.
- Speed up: Increases movement speed by +15%, up to +60%.
- Full of Yourself: Increases damage dealt while at full health by +30%, up to +95%.
- Last Harrah: Increases damage dealt while below half health by +15%, up to +50%.
- Survival Instinct: Decreases damage taken while below half health by +12%, up to +30%.
- Special Moves Reduced Health Cost: Reduces the amount of health consumed in Special Attacks by -10%, up to -30%.
- Sharpen Tool: Increases weapon durability by +30%, up to +150%.
- Tactical Support: 4 rockets fall after performing a Star Move, up to 17.
- Hey, Buddy: A random AI-controlled minion assists the player. Each subsequent upgrade gives a more powerful minion, up to a boss-type minion on level 4.
- Elemental Perks - These perks imbue certain types of attacks with elemental properties, which not only add extra damage, but have other properties important to crowd control and disrupting enemies. Elemental Perks stack with each other, leading to devastating effects. There are three types:
- Electric: Hitting an enemy propagates a percentage of the damage to nearby enemies while also stunning them momentarily. Each additional purchase increases the damage percentage and effect radius.
- Fire: Hitting an enemy creates a fire zone when they hit the ground, which will damage and knock down nearby enemies. Each additional purchase increases the damage. This fire effect is powerful for crowd control and can even interrupt enemy attacks with super armor
- Toxic: Hitting an enemy causes them to take damage over time and be slowed for a few seconds. Each additional purchase increase the duration of damage over time and the slow effect. This effect essentially function like the pools of Toxic Vials, but applied directly to the enemy. This is a powerful perk for boss fights, and will also affect enemies blocking.
Within the Elemental Perks, there are three types of attacks that can be found and imbued
- Blitz Attacks: forward + forward + attack. Characters from the first Streets of Rage do not have Blitz Attacks, so this perk affects their jumping attacks instead.
- Heavy Attacks: the last hit of a full normal combo, and also the Charged Attack.
- Specials: affects all three types of Specials: Defensive, Offensive and Aerial. Characters from the first Streets of Rage do not have Special Attacks (only Star Moves), so this perk affects their back attacks instead.
- Weapons: affects all weapon-types (including throwables like grenades) and attacks: weapon swings, weapon throws and weapon blitz.
- Purple Perks - These perks are "double-edged swords", offering huge boons that are offset by major drawbacks or negative effects. Each purple perk appear only once per run and can't be upgraded
- Blood Thirst: Damage dealt to enemies recover health, however health pickups no longer restore health.
- Elemental Star Move: The bonuses from Elemental Perks are applied to Star Moves, but their base damage is reduced by -50%.
- Glass Cannon: All damage done is increased by +100%, but all damage taken is increased by +60%.
- Ground Level: Increases damage by 15%, increases movement speed by +15% and decreases damage taken by -15%, however jumping height is vastly reduced.
- The Heat Of the Battle: Damage increases by 2% for each hit in a combo, however starting damage is reduced by -90%.
- Old School Rules: Special Attacks cost 40% less health, but can no longer restore green health by attacking enemies.
- Gold Perks - These perks add pick-up items, namely extra Power Stars and the powerful Golden Weapons. Gold Perks are the only types that can drop infinitely, as all other perks appear a limited number of times per wave.
- 3 stars: Drops 3 Power Stars on the ground.
- Golden Weapons: Gives the player one of the respective golden version of existing weapons: Golden Boomerang, Golden Knife, Golden Pipe and Golden Halberd

- Oni admitted that Cody could survive a fight against him if he didn't restrict himself.
- Became mayor of Metro City
- Saved his girlfriend with Mike and Guy
- Beat the Mad Gear gang more than once

- Throws the 584 lb Abigail over his shoulder.

- Can keep up with Guy and Mike
- Can keep up with Zeku

- Takes a beating from Evil Ryu (as seen above)
- Can survive hits ranging from gun shots, flames, grenades, cocktail and a falling chandelier (John wick couldn't do that)

- Defeated the Syndicate with the aid of his friends more than once
- Fought against an alien named Vehelits
- Fought against the Yamatos, who are capable of using magical illusions where they can even split themselves to attack and can even run at supernatural speeds
- Defeated the best ranked fighters assassins in the entire world becoming one of the best fighters in the world
- Managed to destroy Robot Y before the bombs went off in the City

- He can destroy motorcycles,telephone booths,large metal barrels,small barricades,metal chimneys,metal surviving tables and large doors
- Can throw anything for long distances (including large crates and golden statues) (195 - 3,232 Tons)

- Can fight through dozens of expert fighters and assassins from night until morning he also does this once again in Streets of Rage 2
- Just like every part of the main cast in Streets of Rage he get back up after being whipped, tazed, exposed to poisonous chemicals, and hit by Molotov cocktails, exploding oil drums, and rocket launchers


- Ryu’s energy is used to charge the Psycho Drive which destroys a city (33.3 Megatons - 1.1 Gigatons of TNT)
- Ken intercepts Bison’s Psycho Crusher which can tag a Satellite laser (Mach 1,166 - 0.0166c)
- Both Ryu and Ken have beaten Balrog who can survive Shadoloo’s Base exploding (11.5 - 30.52 Kilotons of TNT)
- Juri’s Feng Shui Engine can absorb enough energy to blow up a mountain in Xinjiang (15 - 133 Megatons of TNT)

- Both Zangief and R.Mika take a hit from Balrog, whose blows are known to kill elephants


- Max is capable of amping his body with his lightning powers giving him the power and speed of his lightning (0.239 - 239 Tons of TNT) and (Mach 364)
- Floyd's arms are robotic and composed of the Rakushin explosive
- 1 of 4 characters who survive the rocket launcher explosion (0.31 - 0.78 Tons of TNT)
- 1 of 4 character who survives a plane crash (4.553 Tons of TNT)
- Rakushin surpasses Mr.X’s standard terrorist explosives that can blow up a cruise ship (118.08 Tons of TNT)
- Rakushin is potent enough to blow up a factory (2.582 Tons of TNT - 2.923 Kilotons of TNT)
- It’s also capable of blowing up a part of a city (216.994 Kilotons of TNT - 3.1 Megatons of TNT or 18.62 Megatons of TNT)

- Break the robot, can perform all of Axel’s moves including his fire based moves with sheer friction (0.08 - 3.7 Tons of TNT and Mach 5 - 23)


- Far Far stronger and more durable even with Axel's perks
- Strong enough to one tap Axel
- More experienced
- Fought people like Axel (Ryu)
- Can gain hyper armor with focus attack and drive impact
- Drive system gives Cody more defensive and offensive options and allows him to parry or perfect parry Axel
- V system allows Cody to reverse Axel's attack or straight up just dodge them and follow up with his own hits
- Purple perks make it so its easier for Cody to damage Axel
- Purple perks make it so Axel has -90% less damage at the start of the fight until Axel lands a combo
- Has an item that makes him take no damage for a few seconds
- Far slower than Axel even with High end for Ken feat
- Not as skilled as a fighter
- Axel's fought people who fight dirty like Cody
- Axel has more super attacks
- Axel has better and a bigger arsenal of weapons
- Axel has weapons that can pierce Cody's defenses
- Axel can apply status ailments such as stun, burn and poison on Cody
- Axel maybe able to close the range gap with his longer range melee weapons, grenades and stun gun
- Cant do nothing against Axel's perks to increase his strength, speed and defense
- Axel will be able to spam super attack thanks to reduce health perk
- Axel's weapons are gonna last overall longer than Cody's
- Axel will be able to heal off of each attacks
- Axel can increase his strength by 2% each combo landed
- Landing a combo would be easy for Axel thanks to his speed advantage
- Golden weapons give Axel more weapons to use in the battle
- Both have 1-UPs items
- Both have food to heal
- Both have firearms

- Far faster than Cody’s high end and a lot more with the low end
- More skilled fighter
- Can get used to Cody fighting style as he's fought guys like him
- More super attacks to dish out
- Bigger and better arsenal of weapons
- Can pierce through Cody's defense with Halberd and Golden Halberd
- Can apply status ailments such as stun, poison and burn on Cody
- Can fight back against Cody's firearms with his grenades, stun gun and his own explosive weapons
- Has perks to increase his strength, speed and defense
- Has perks to increase his strength, speed and defense depending on how much health he has
- Has perks to reduce the amount of Hp is taken from super moves
- Has a perk to increase weapon durability
- Has elemental perks to add stats ailments to all weapons
- Purple perks helps Axel increase his strength, speed and defense
- Can recover his health with each hit
- Purple perks allow Axel to increase his damage by 2% for each combo landed
- Golden weapons give Axel more weapons to use
- Landing a combo wont be a problem due to his massive speed advantage
- Far weaker and less durable even with his perks
- Cody overall has more firearms to use
- Cody can one tap him if he lands a good hit
- not as experienced
- Cody has fought people like Axel
- Focus attacks and drive impact gives Cody hyper armor
- Drive system gives Cody more defensive and offensive options and allows him to parry or perfect parry
- V system allows Cody to reverse attack or straight up just dodge them and follow up with his own hits
- The Glass Cannon perk is gonna make it so that Axel takes more damage
- starts out with 90% less damage until he lands a combo
- Cody has an item that makes him take no item for a few seconds
- Both have 1-UPs items
- Both have food to heal
- Both have firearms


Comments
Post a Comment